
Welcome to another tutorial! This time you will learn how to
create simple printable reports in VB6 and MS Access using Data Environment and
Data Report. Again, I would like to stress out that the approach that I am going to user is a simple
one.
To start with, I will assume that you have the latest copy
of our project, open it and add a
Data Environment. How? Follow the steps below:
- Go to your project window and right click on Project1.
- Select Add then Data Environment.
- You will be prompted with a DataEnvironment window. Within it, by default, you will see DataEnvironment1 and Connection1 objects.
- Right click on Connection1 and select Properties.

- A Data Link Properties Window pops-up. Under Provider tab, select Microsoft Jet 4.0 OLE DB Provider and click Next button.

- Right now, Connection tab is the default tab. From there, point the DataEnvironment to your database. In short, browse for your database.
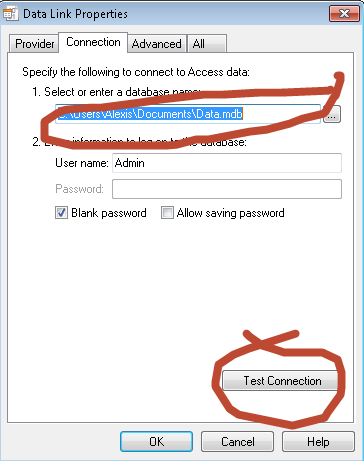
- Once done, click the Test Connection button to test the connection.
- If executed properly, you will get a msgbox saying “Test connection succeeded”.
- ight click on Connection1 and select Add Command.
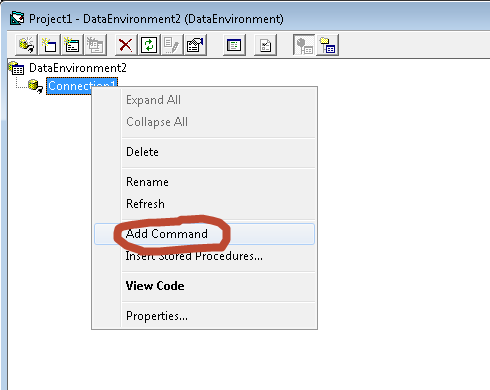
- A new command will be created, if this is your first command, its default name is Command1.
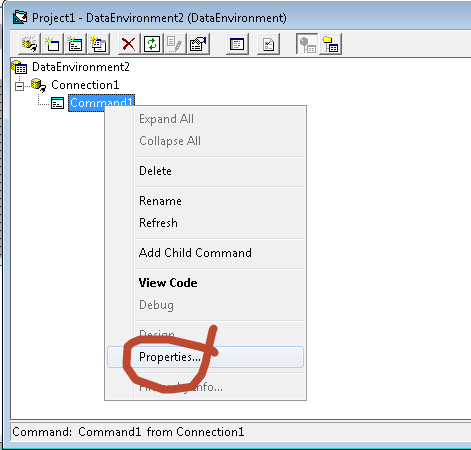
- Right click on the newly created command and select Properties.
- Command1 Properties window will popup. Under General tab toggle Connection box and select our newly created connection Connection1.
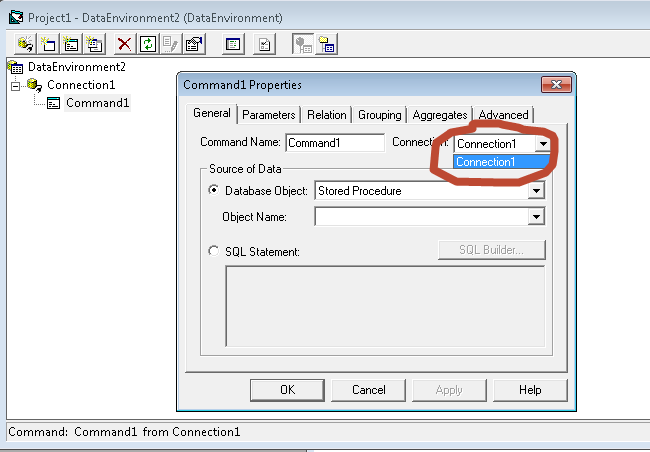
- Next, set the Database Object to Table and select an Object Name from the list (Student or Vendor).
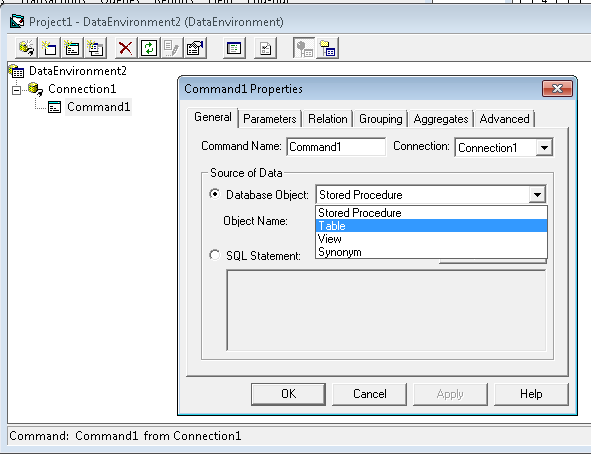
- Finally, click OK.
- Add a Data Report to your Project. How? Right click on Project1 in you Properties window and select Data Report.
- A new Data Report form will be created. Set its DataSource property to 'Connection1' and DataMember to 'Command1'.
- If you are experiencing any problems related to the connection at this point, you might want to re-visit the steps above.
Considering you have flawlessly executed the instructions, you are now ready to add data fields to your report form. To do this, just simply drag and drop any fields that you want to appear to your report (Data Report) from the Commands in your Data Environment. Finally, format your report according to your requirements.

Here comes the coding part. Remember recently we have added Report menu to our MDIForm? We are going to invoke the report using Studentlist item. Go to the Click event procedure of Studentlist and paste the following source code:
DataReport1.Show
Run the application and test the report.
For Viral Stuff and Trending News, visit http://www.fooviral.com.
No comments:
Post a Comment